I was tasked with auto deploying around 100 Ciscso UCS blades with stateful ESXi 7.0 on SD cards with as little touch as possible for a new environment
There are various ways of doing this but it was decided that the service profile name in UCS would need to match the ESXI host. This means we’d need to match the MAC Address of the primary vNIC to a DHCP reservation. Reverse and forward DNS lookups would also need to be in place before booting. Here are the steps to achieve this:
On the Cisco UCS FIs
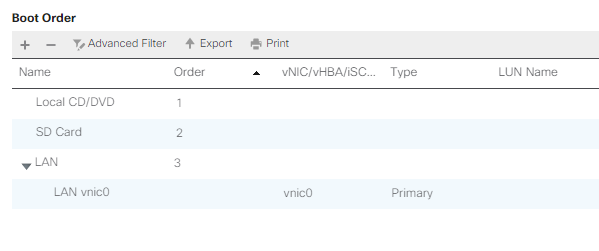
Change Boot order in the service Profile to be the following:
In our case we booted using vNic0 which includes the ESXi Management network
As mentioned above we are going to boot and assign the management network IP address directly. We can do this by assigning the ESXi Management as the native VLAN in the Service Profile. In this case I used vlan groups so I just needed to make the change here:
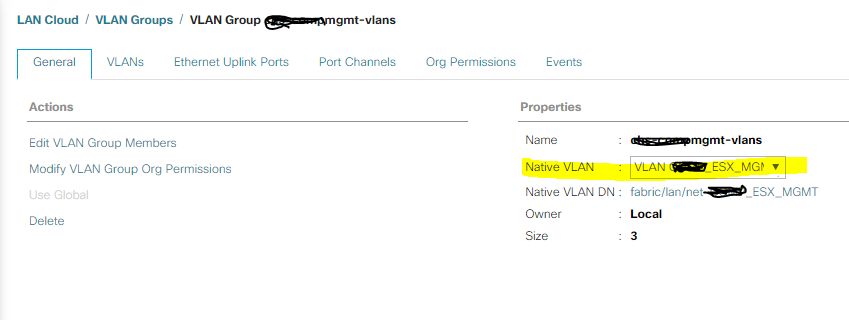
As we are using native vlans we don’t need to put the VLAN in the ESXi IP configuration as the UCS deals with this. You may not be able to do this depending on your network setup and may require a different PXE boot network.
DHCP and DNS
This was semi-automated at build time and I’ll be writing a script to add DNS and DHCP reservations for future deployments. Essentially the pseudo code for this would be
- Create Service Profile from Template
- Get MAC Address of vNic0
- Add DHCP reservation in Windows 2019 DHCP server
- Add reverse and forward DNS entries in Windows 2019 DNS server
VMware
This was the trickiest part as Host Profiles are pretty flaky at the best of times. I wont go over the auto deploy configuration as that is well documented.
I built a reference host manually then exported the host profile config. All our Vmks will be getting DHCP so we needed to put IP-Helpers in beforehand.
Once the reference host was built we needed to tweak the host profile with the following:
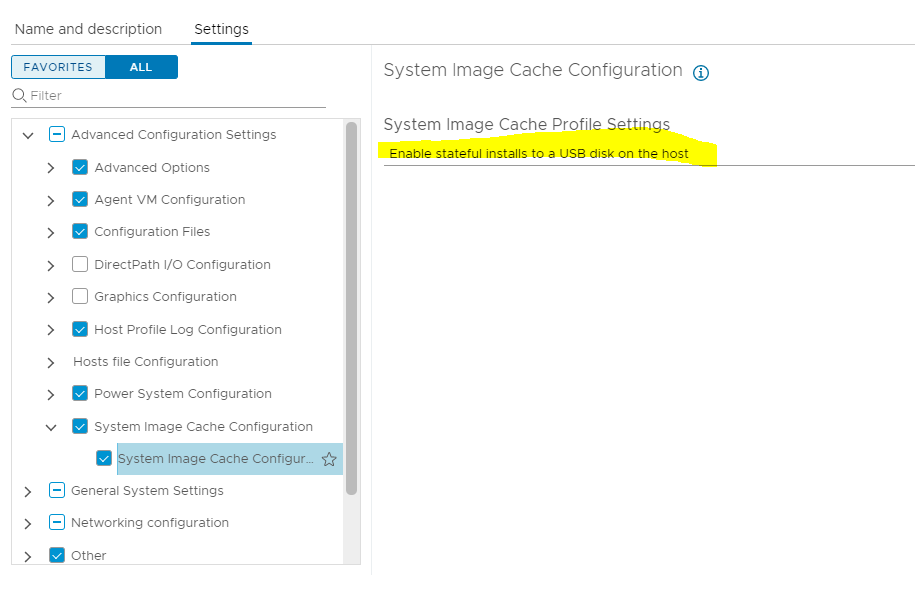
Change Cache Profile settings
This was a bit of a gotcha as the host ESXi host actually sees the Cisco FlexFlash SD card as a USB drive. This needs to be changed to “Enable stateful install to a USB disk on this host”
Set the management interface to have the physical NIC MAC address

Remove Core Dumps
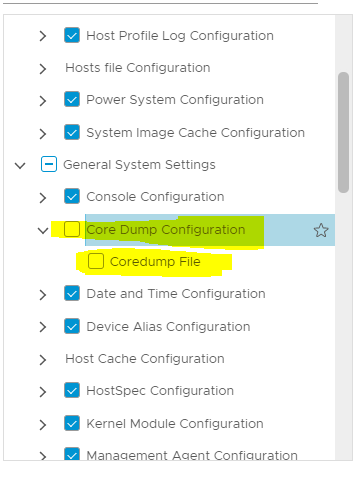
Host Profiles failed to apply unless this was disabled due to having no storage configured
Set root Password

One thing I did notice is if you make any alterations it is better to update the reference host and extract the host profile again – rather than editing the host profile.
Miscellaneous
The iSCSI IQN name was an issue for us. As our target storage (Netapp Ontap) doesn’t accept wildcards so we needed to make the IQN the name of the host . This IQN needs to be prepopulated in the Initiator Groups in Ontap. To get around this and remove the extra text from the initiator I wrote the following shell script and added it to the Script Bundle when auto deploy
#!/bin/sh

ESXHOST=`hostname | cut -d"." -f1`

esxcli iscsi adapter set -A vmhba64 -n iqn.1998-01.com.vmware:$ESXHOST
Note: Despite this applying correctly during host profile configuration the host required an extra manual reboot after completion.
Scratch partitions are also an issue with using SD Cards and stateful installs. We required a post-install script to update these as well.
Summary
All in all the time to deployment of the hosts is quick but Auto Deploy still falls down a bit and I’d be looking to use something like Ansible for next install
You must be logged in to post a comment.